
Local printers
- Add printer from the Simmer dashboard
- Select the printer type “Local printer (Shopify POS Connected)”
- Enter the printer’s device name (Optional)
- From within the Simmer POS extension click “Send” on the ticket you want to print
Print directly to the receipt printer connected to your Shopify POS device, with no extra print dialog.
Note: This printing method prints to the receipt printer set up within Shopify POS (Connectivity > Receipt printer). If you don't have a POS-connected receipt printer, Simmer will fall back to the device's system print dialog (for example AirPrint on iOS or the Android print service).
1. Add printer from the Simmer dashboard:

2. Select the printer type “Local printer (Shopify POS Connected)”
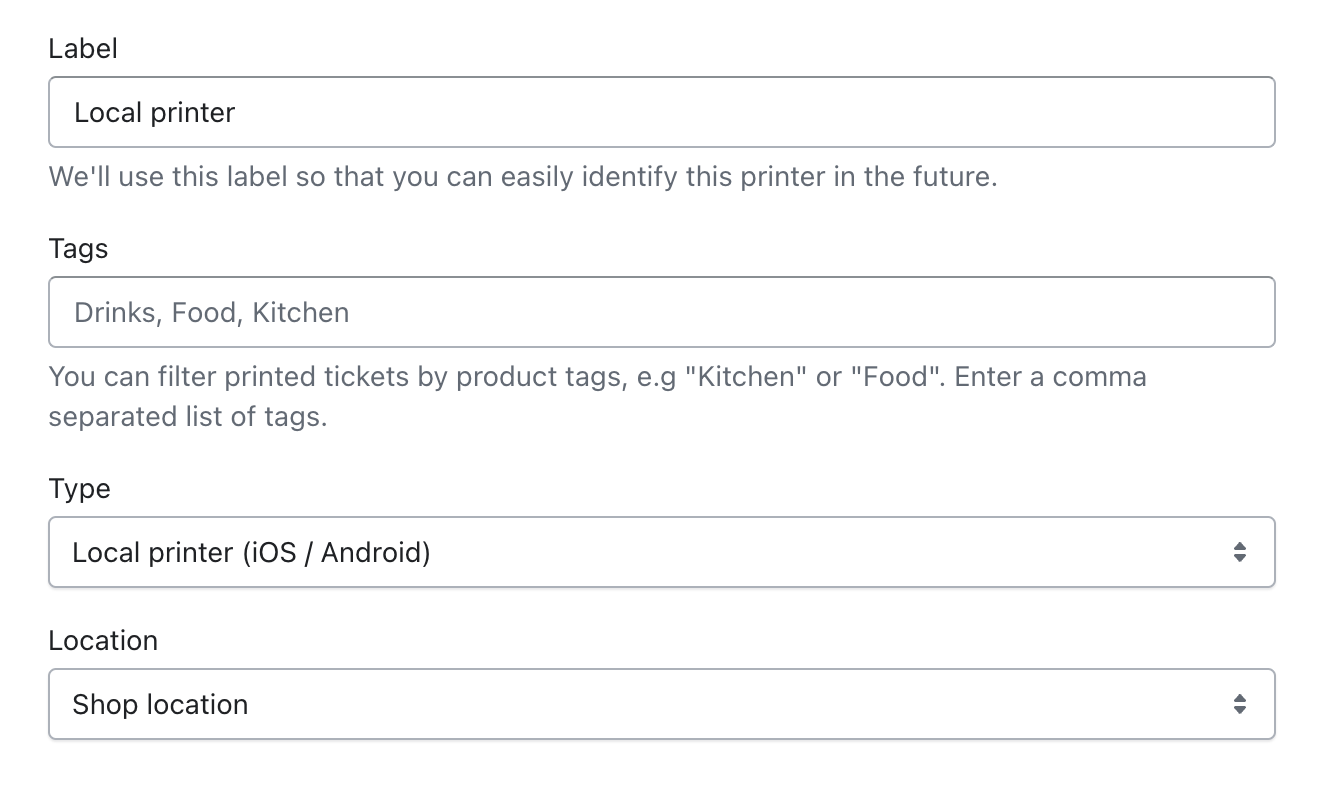
3. Enter the printer’s device name (Optional)
Enter the printer’s Device name exactly as it appears on Shopify POS under Connectivity > Receipt printer > Device name (for example “Star TSP143” or “Front Counter Printer”).
If more than one receipt printer is connected to the device, the device name ensures tickets are sent to the correct one. If left blank, the first available printer is used.
4. From within the Simmer POS extension click “Send” on the ticket you want to print.
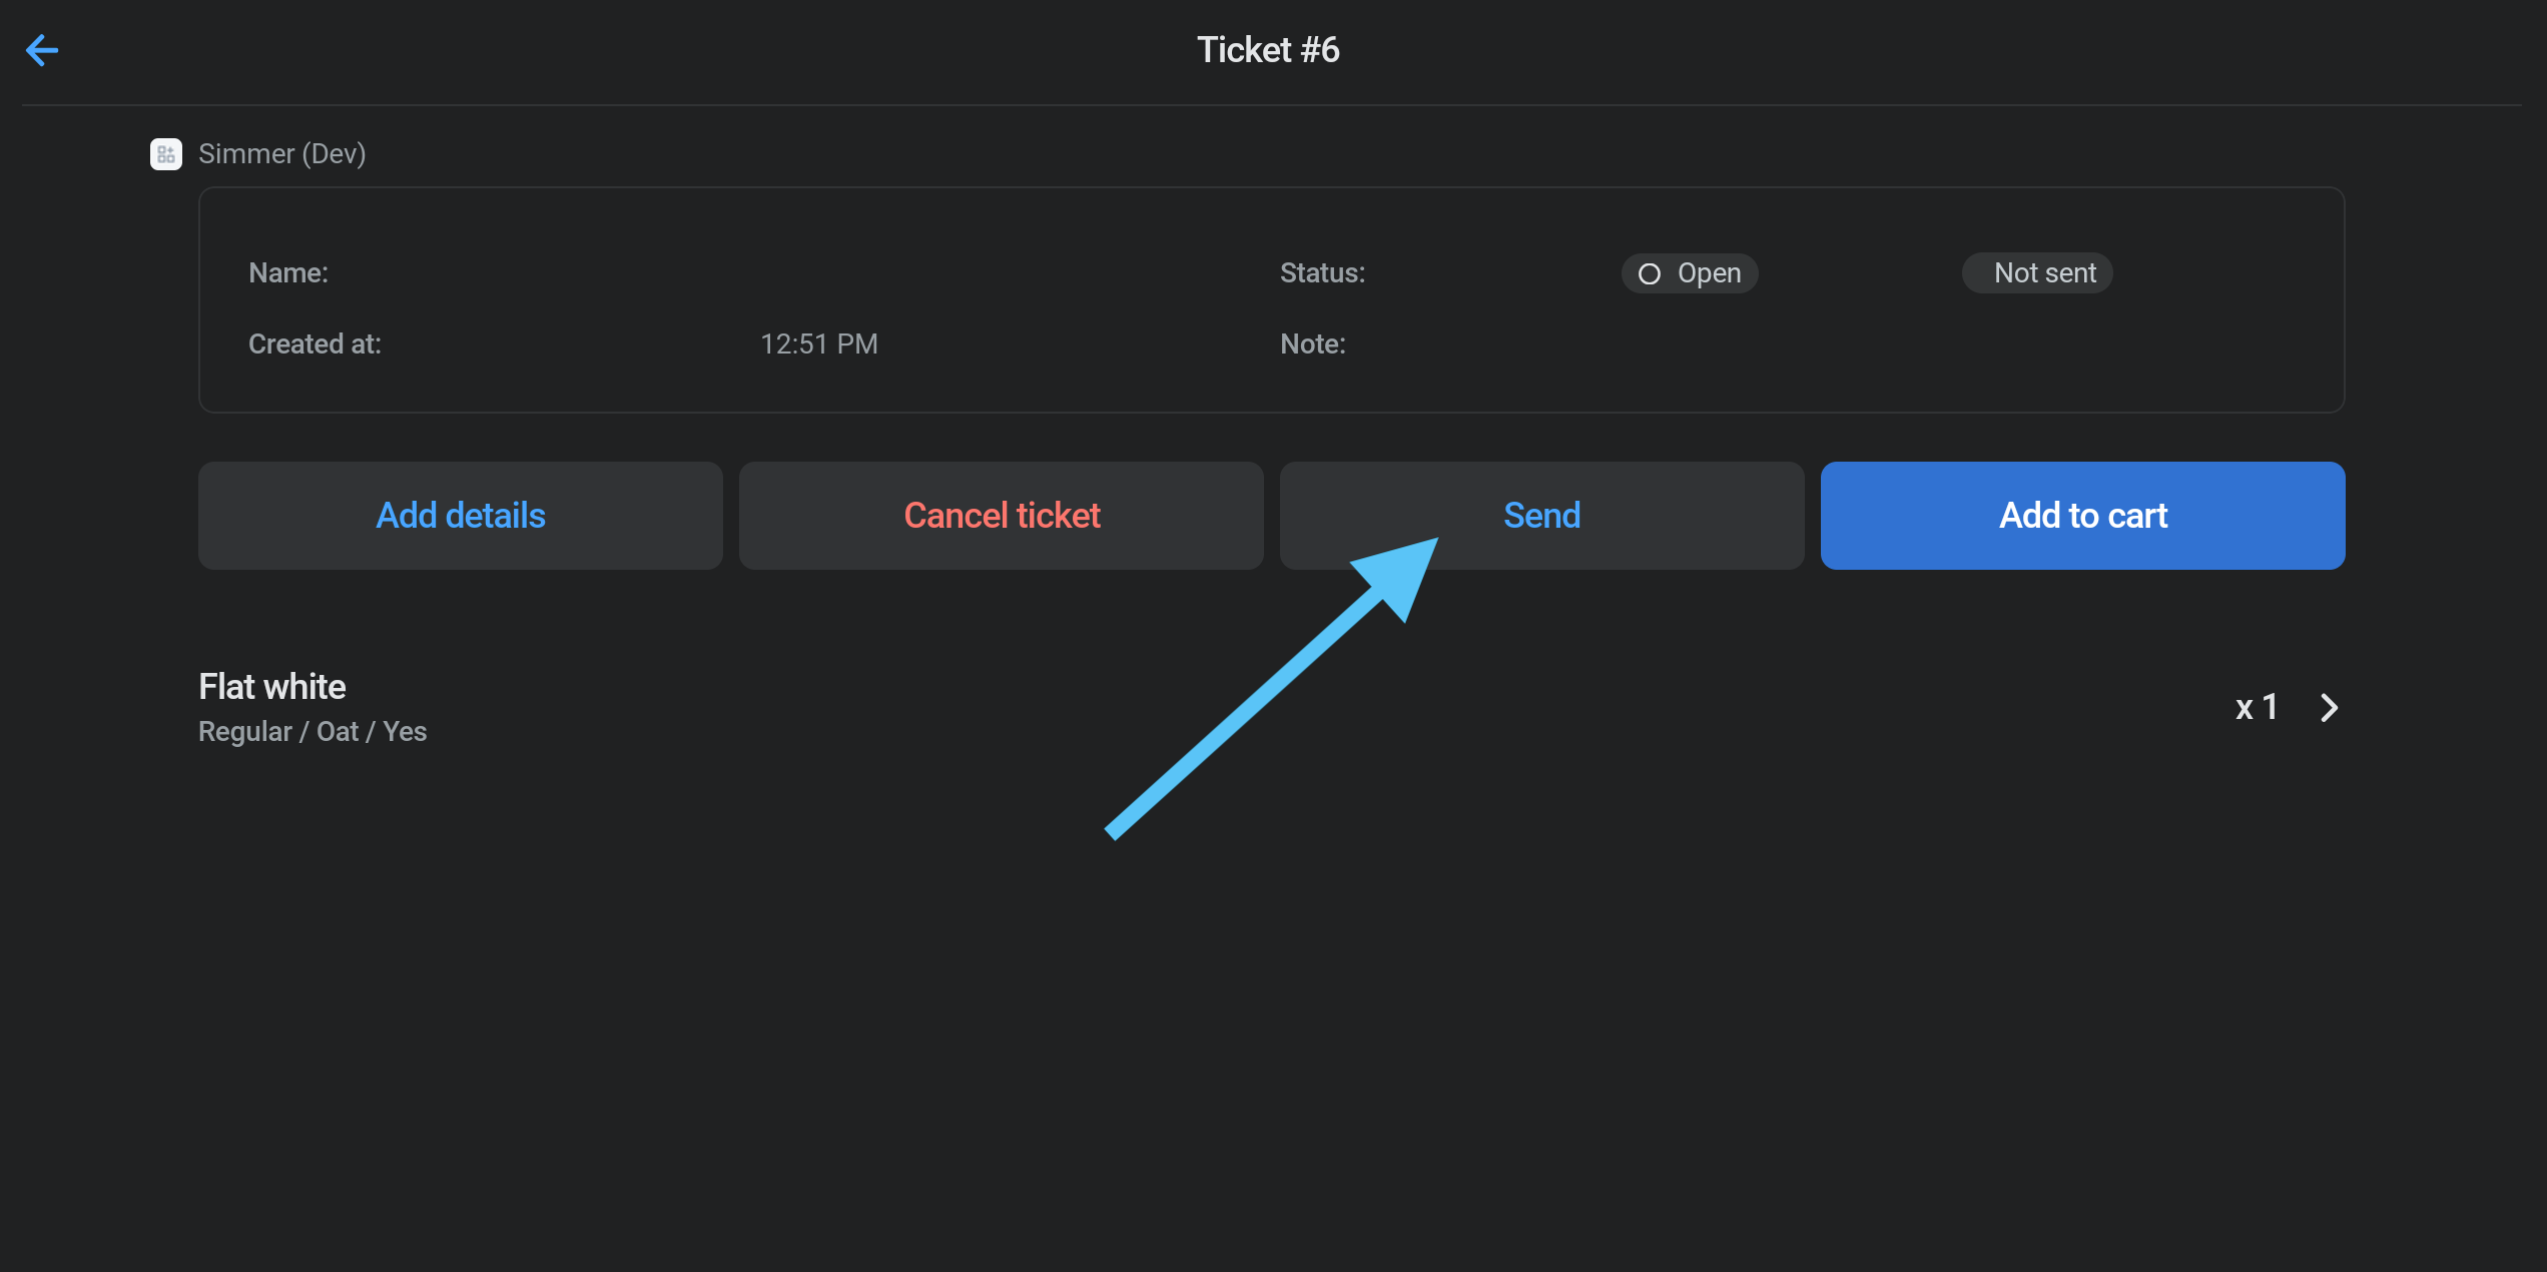
The ticket will print straight to your connected receipt printer.