Epson ticket printer guide
- Create a ticket printer
- Configure the Epson printer
- Navigate to your printer’s LAN address
- Click Advanced Settings
- Click Administrator Login (top right)
- Enter Printer Serial No. to login
- Click TM-i Settings (opens in new tab)
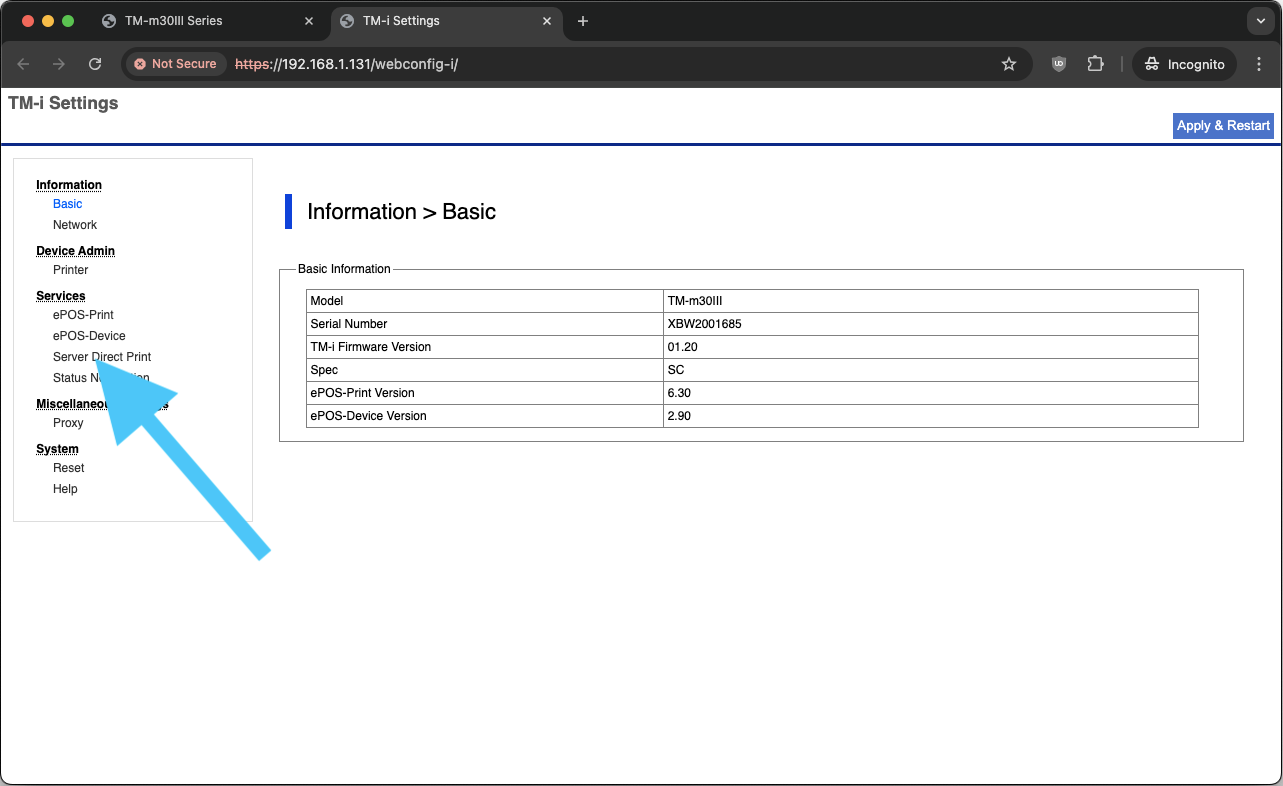
- Click Server Direct Print
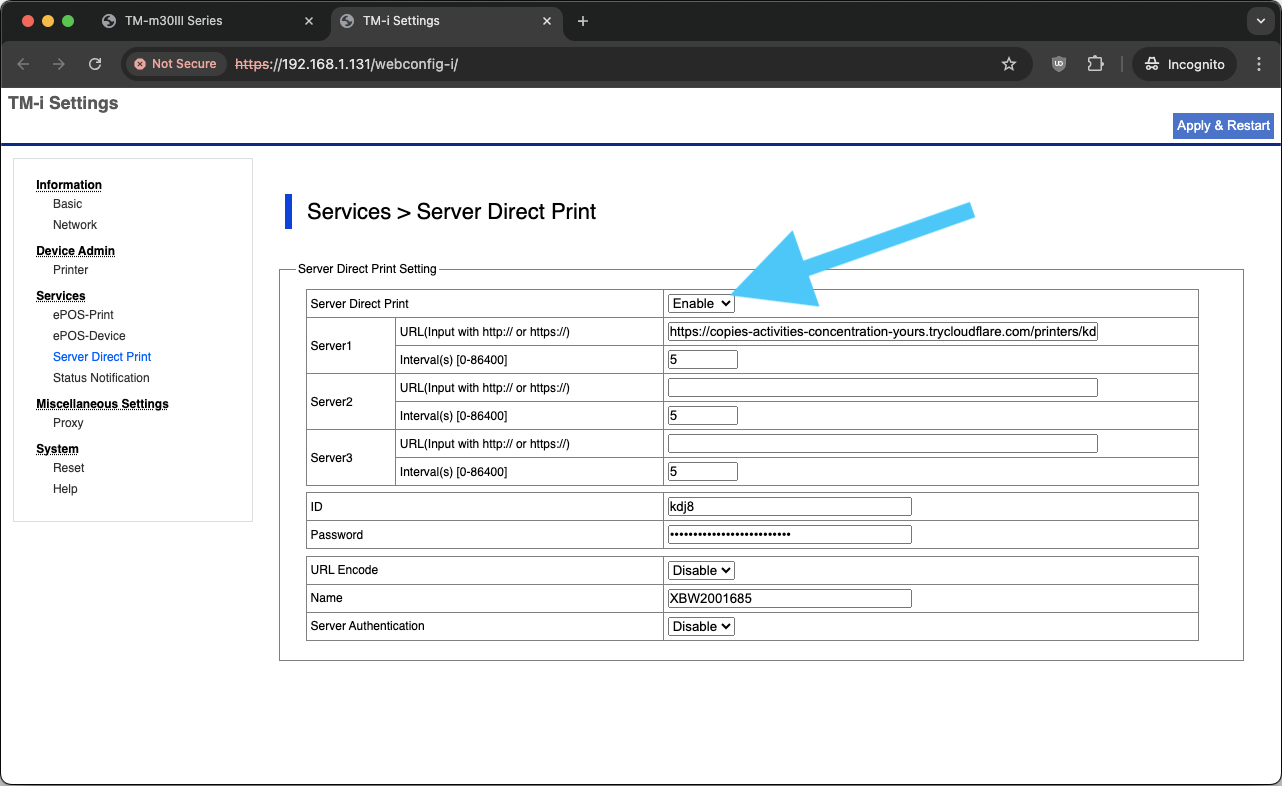
- Enable Server Direct Print
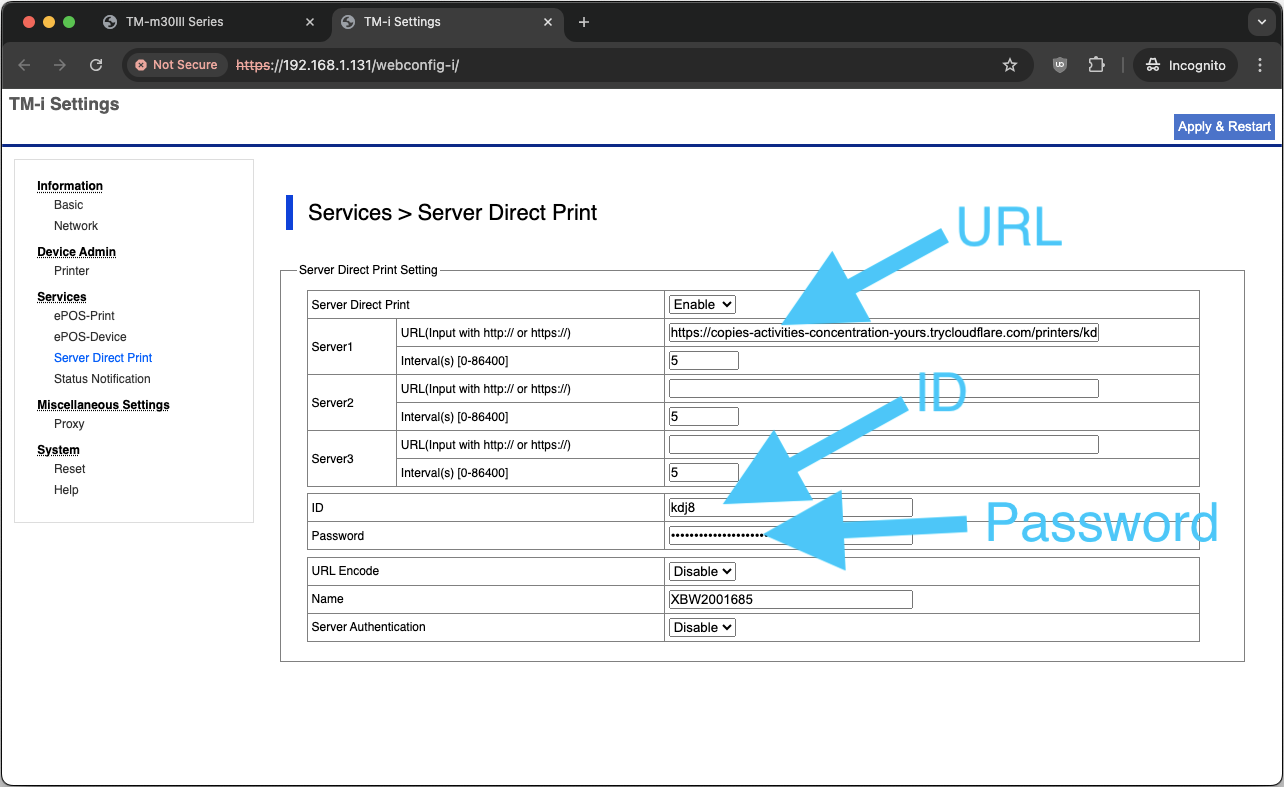
- Populate Server 1 with URL, ID, and Password
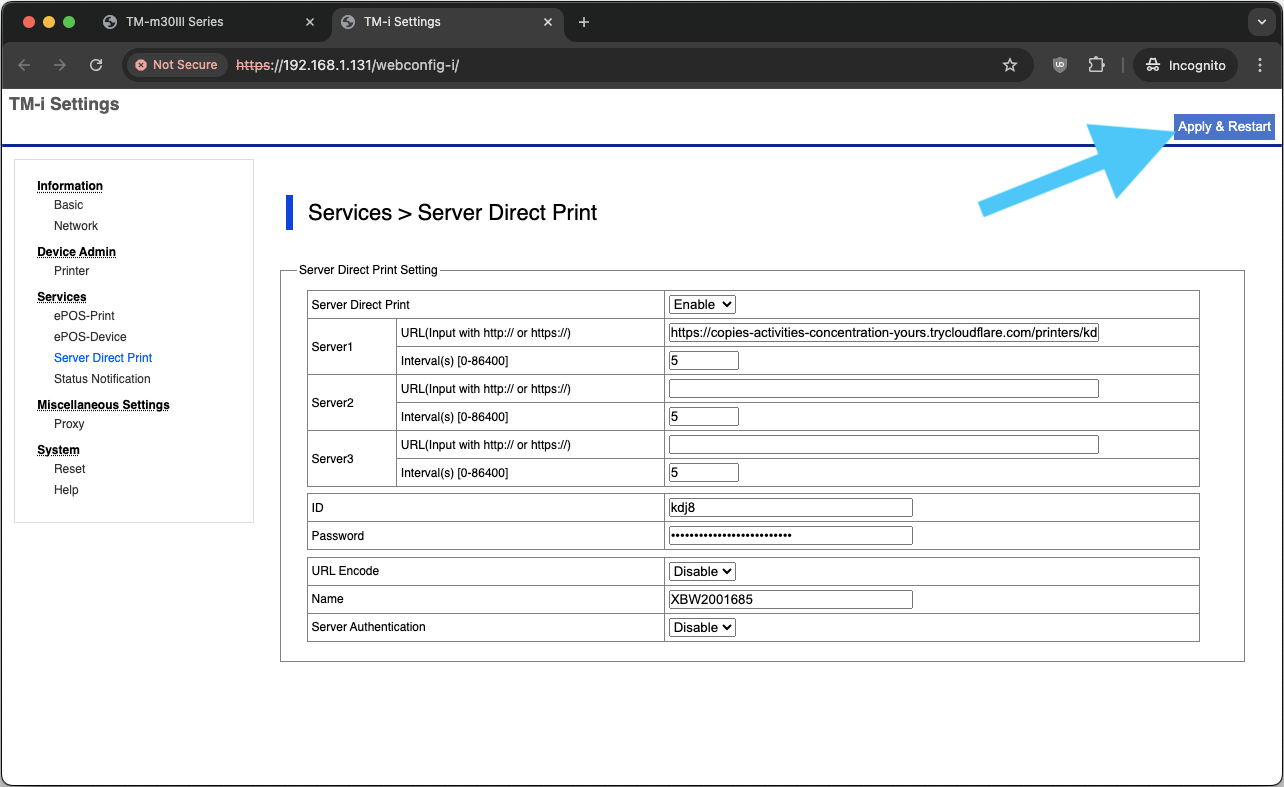
- Click Apply & Restart
- Click OK
- Print tickets
Simmer currently supports the following Epson printers with Server Direct Print:
- Epson TM-DT series,
- Epson TM-i series
- Epson TM-T88VI
If you are unsure if your printer supports Server Direct Print, please contact help@simmerpos.com.
Create a ticket printer
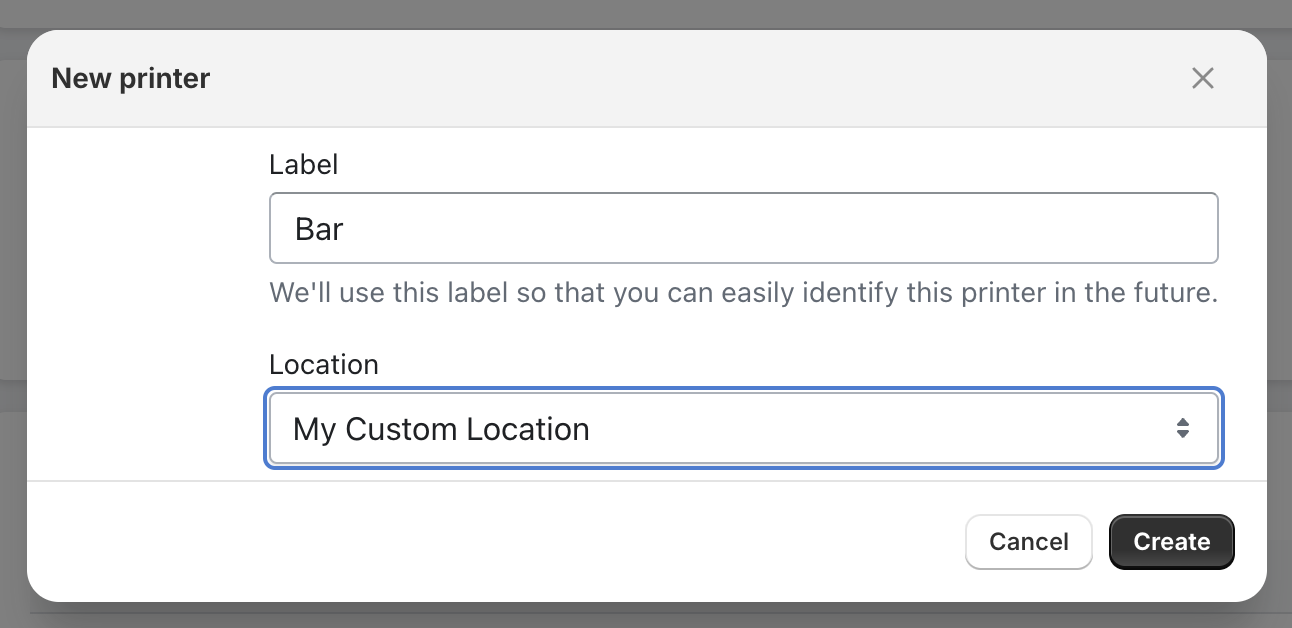
1. Add printer from the Simmer dashboard:

2. Give your printer a name, brand and select the Shopify location you want to use it in:
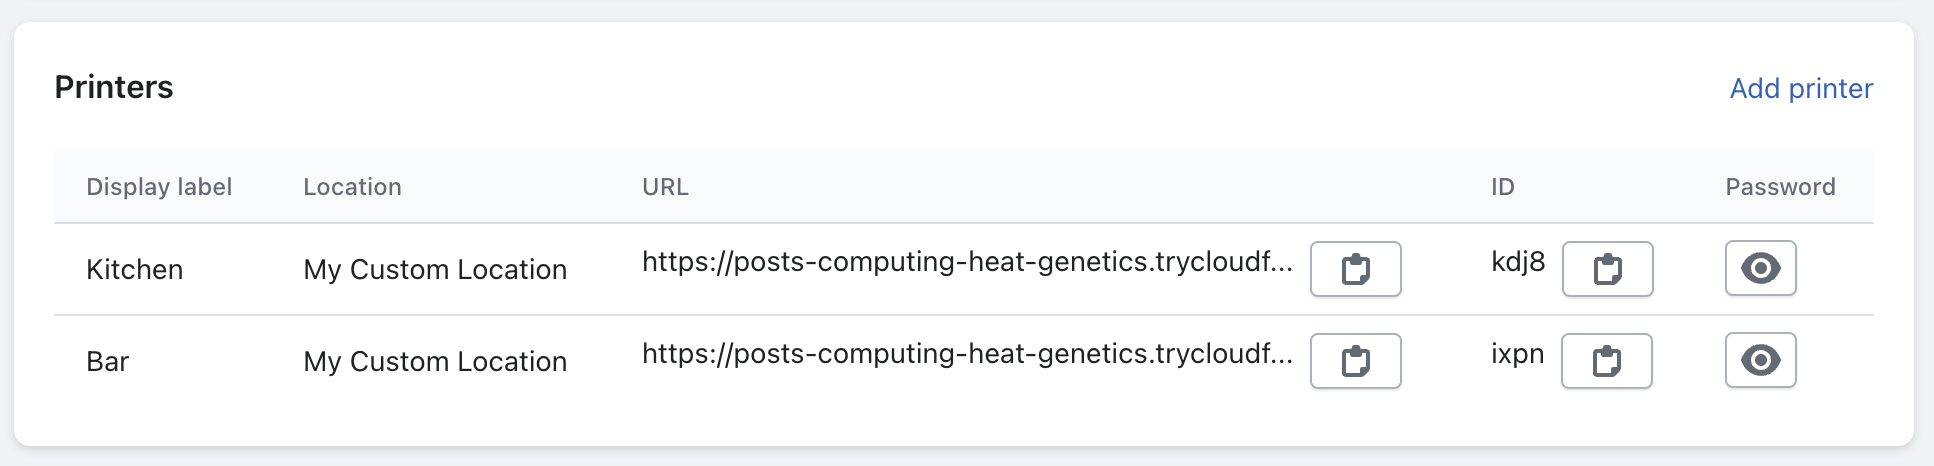
3. Use the printer’s credentials in the following guide on how to configure the printer:
Configure the Epson printer
Note: The instructions are for Epson TM-m30III. The interface may vary slightly for other Epson printers.
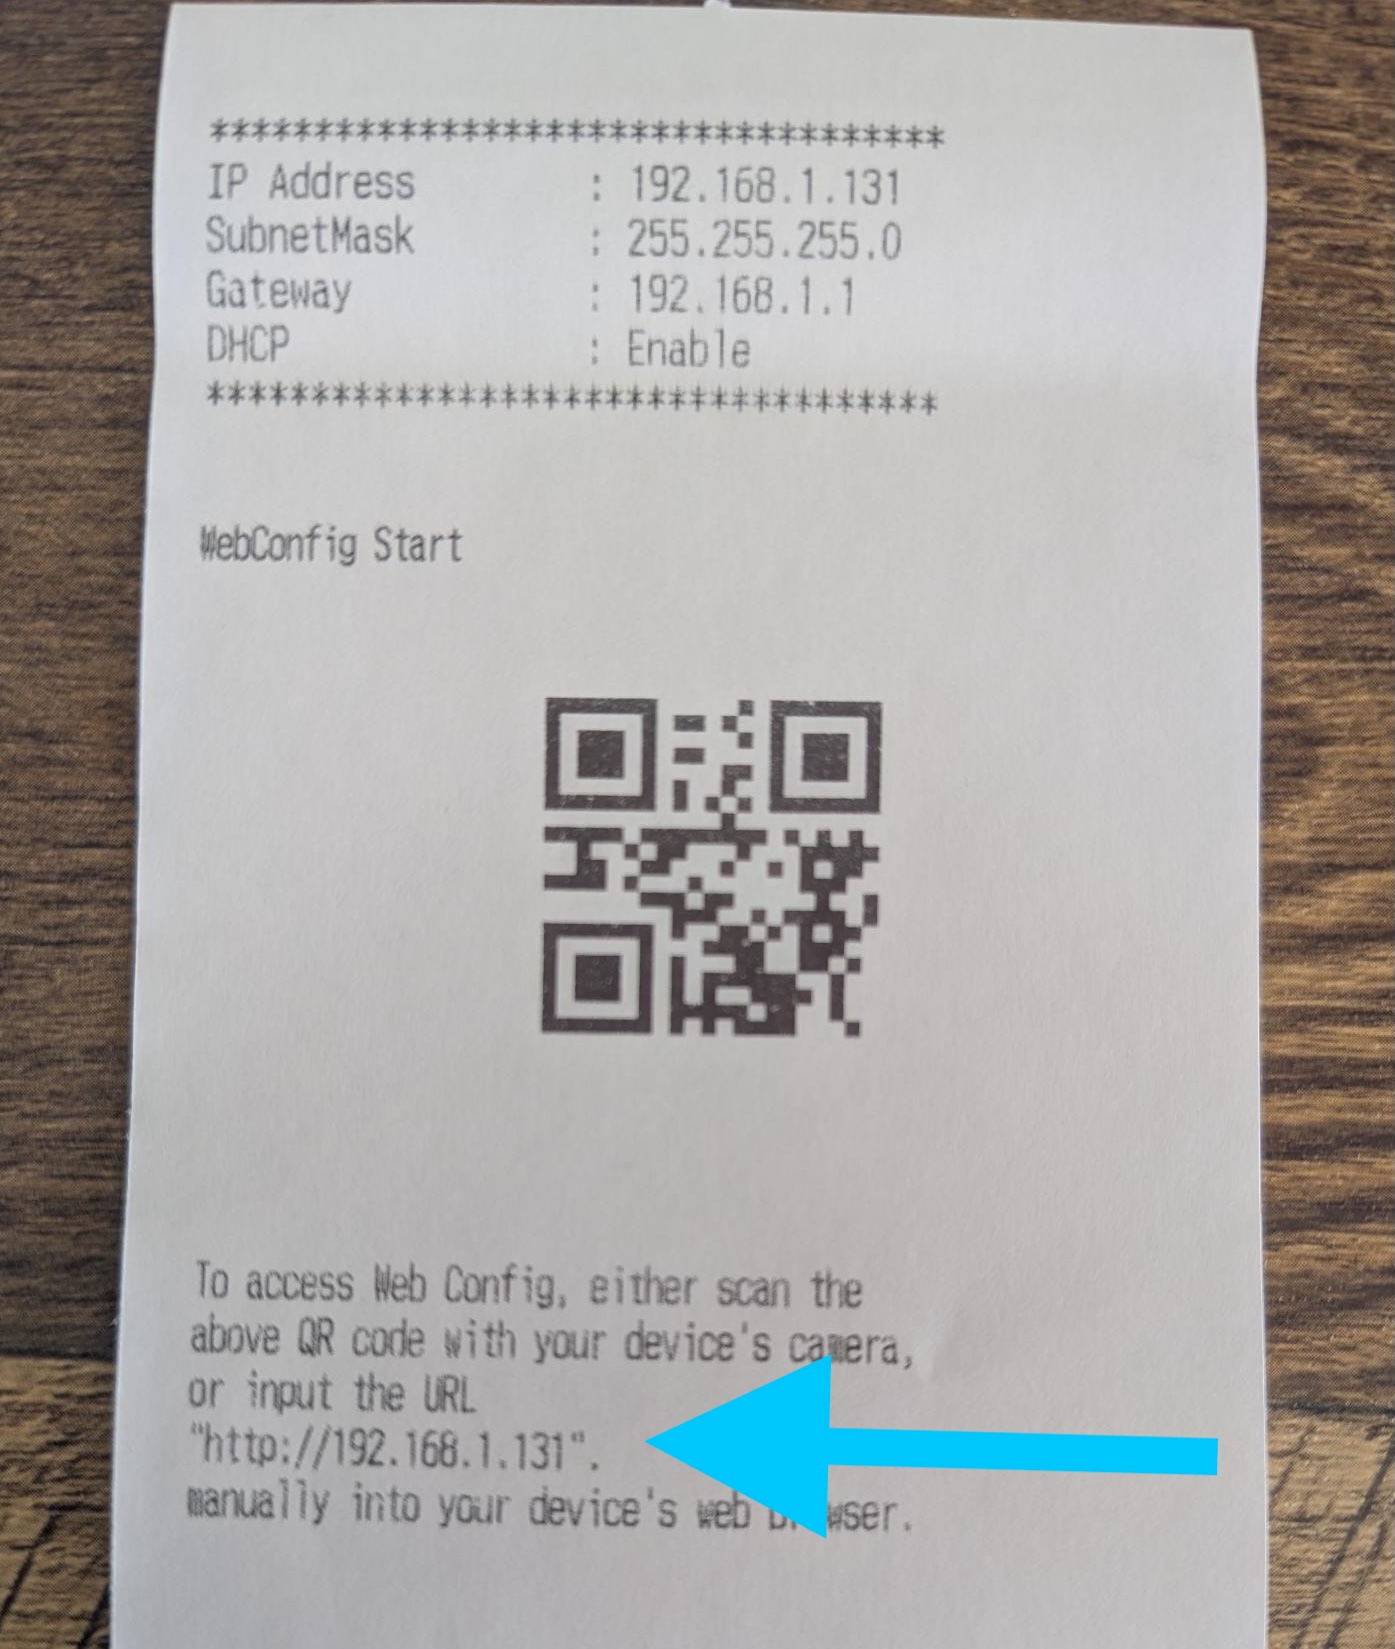
1. Navigate to your printer’s LAN address:
Your printer should print out a receipt with your printer’s LAN address upon turning it on.
Enter the IP address into your browser to navigate to the printer’s settings page, e.g http://192.168.1.131. (replace with your printer’s actual IP address).
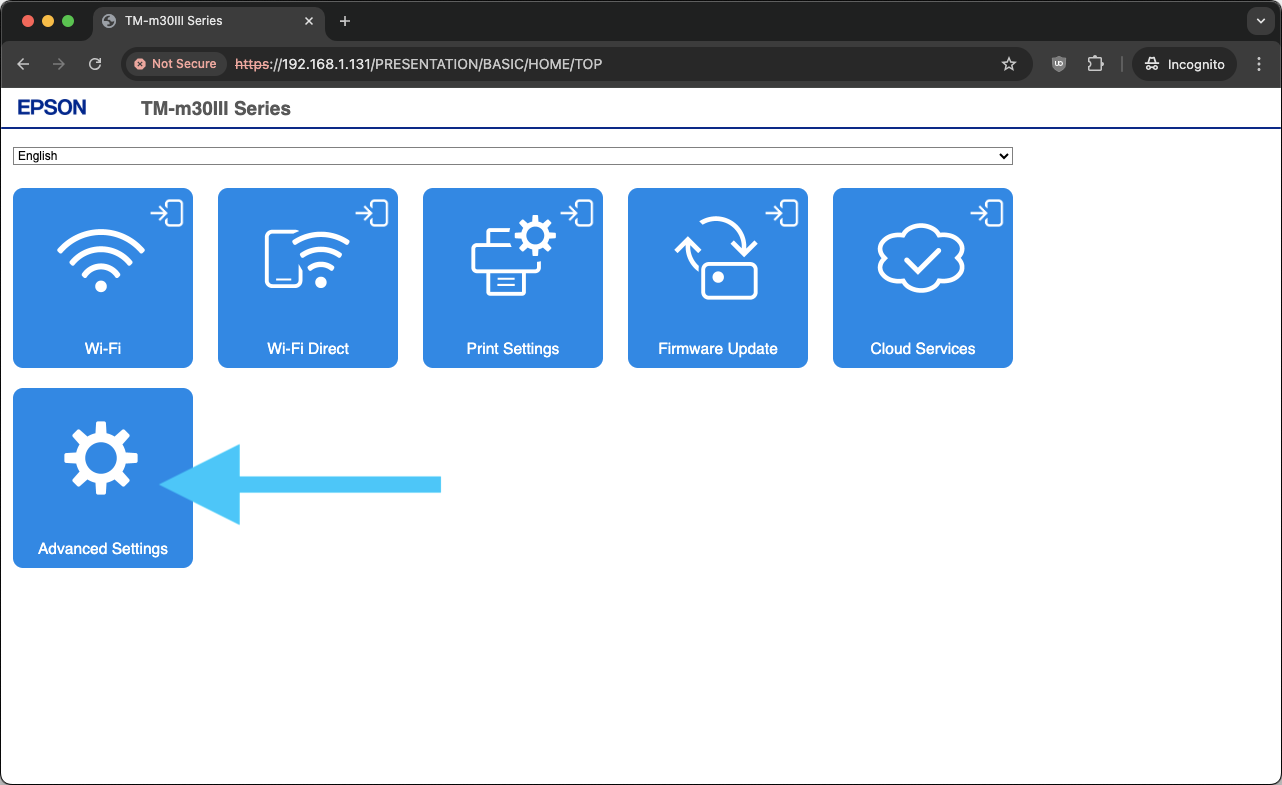
2. Click Advanced Settings
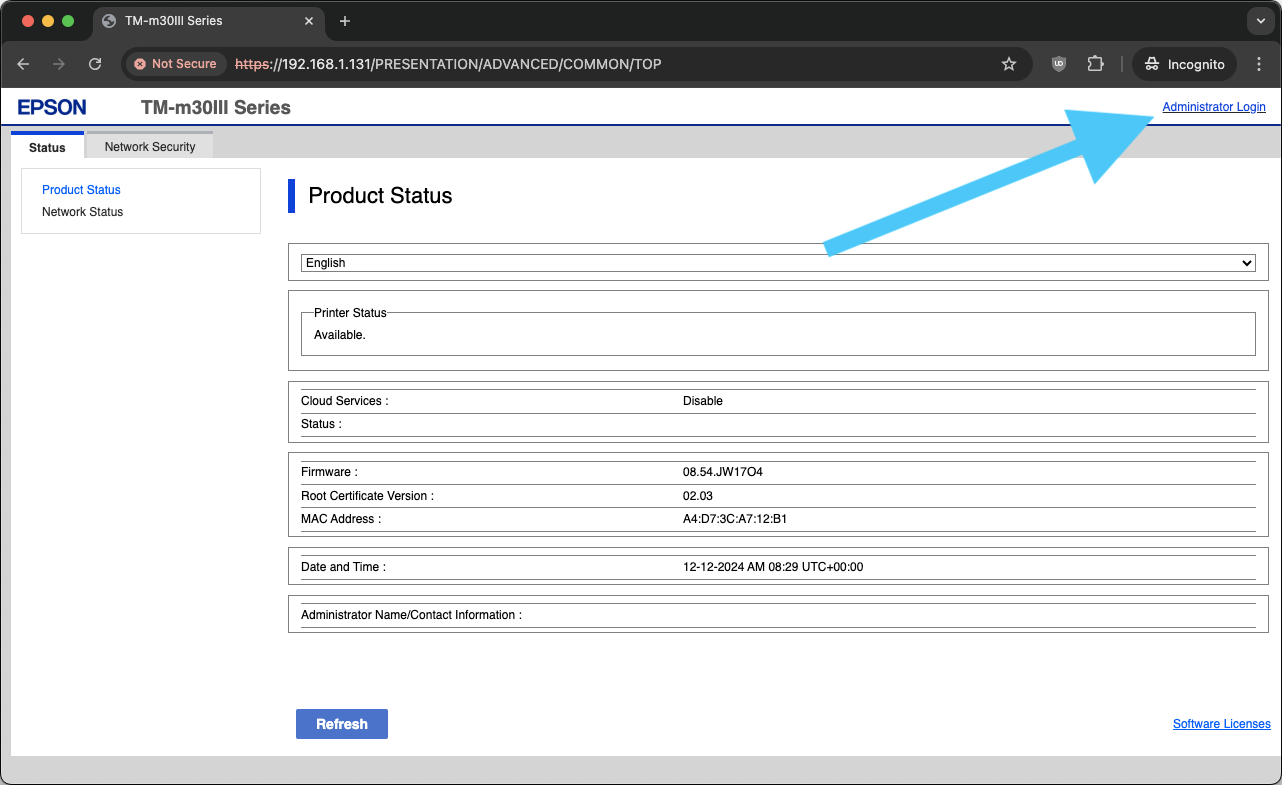
3. Click Administrator Login (top right)
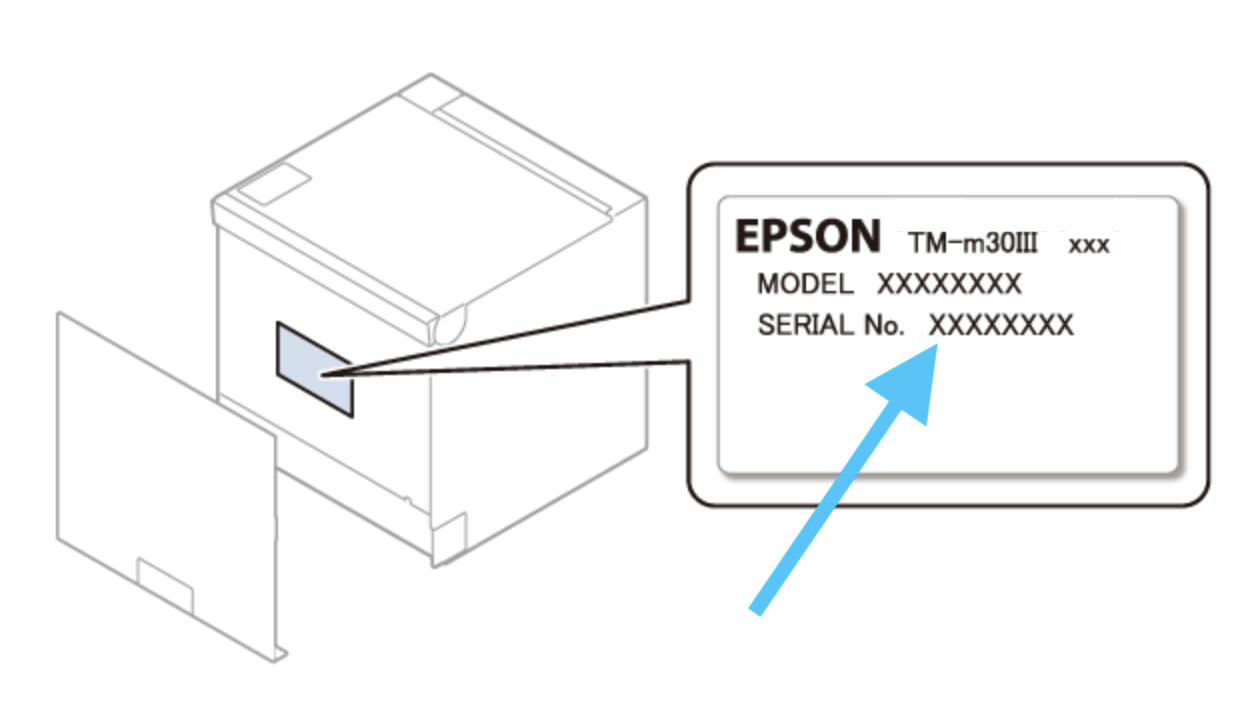
4. Enter Printer Serial No. to login

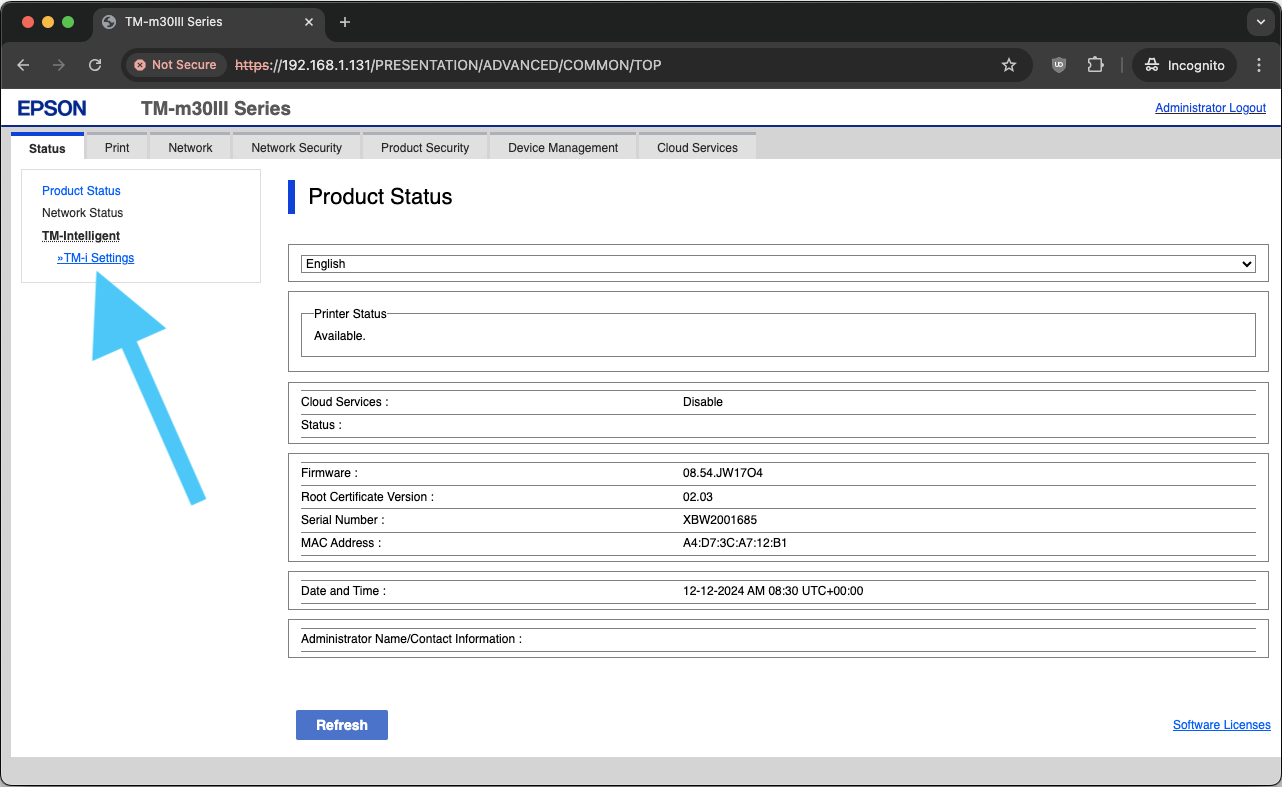
5. Click TM-i Settings (opens in new tab)
6. Click Server Direct Print
7. Enable Server Direct Print
8. Populate Server 1 with URL, ID, and Password
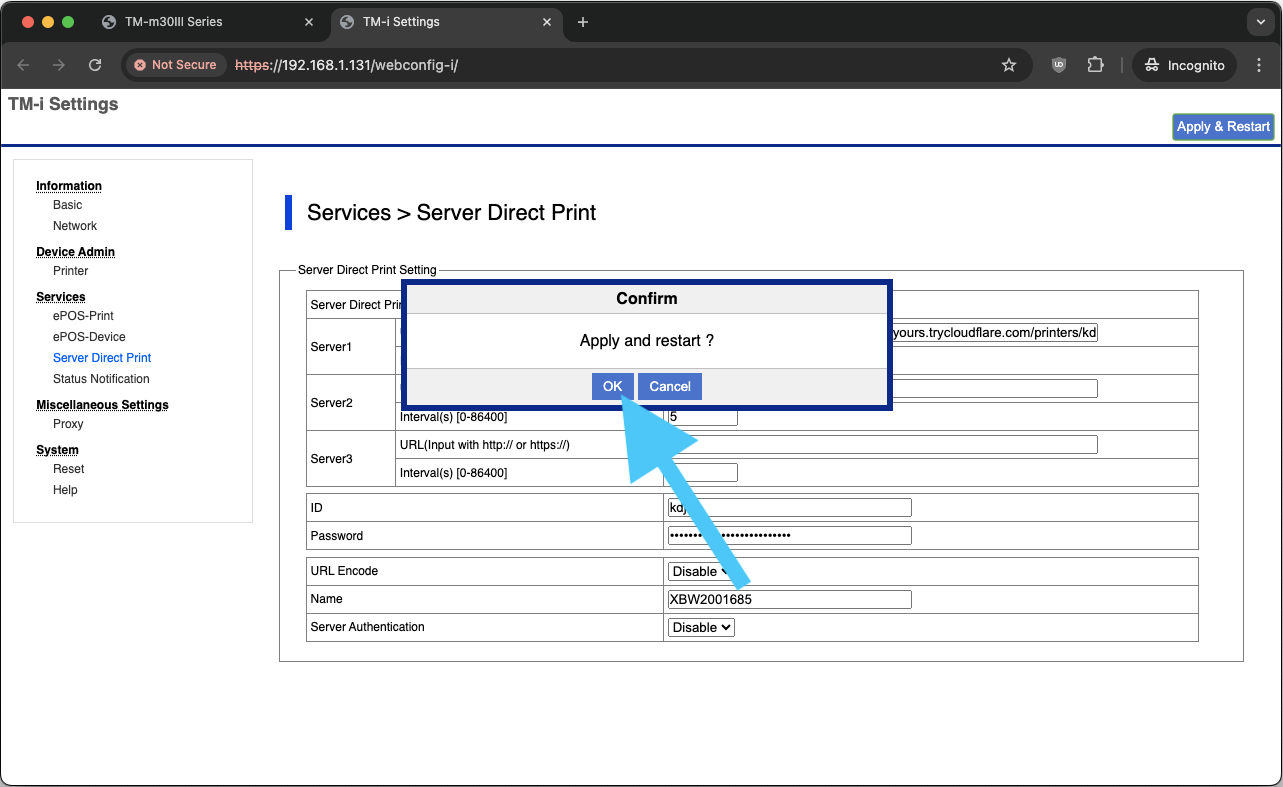
9. Click Apply & Restart
10. Click OK
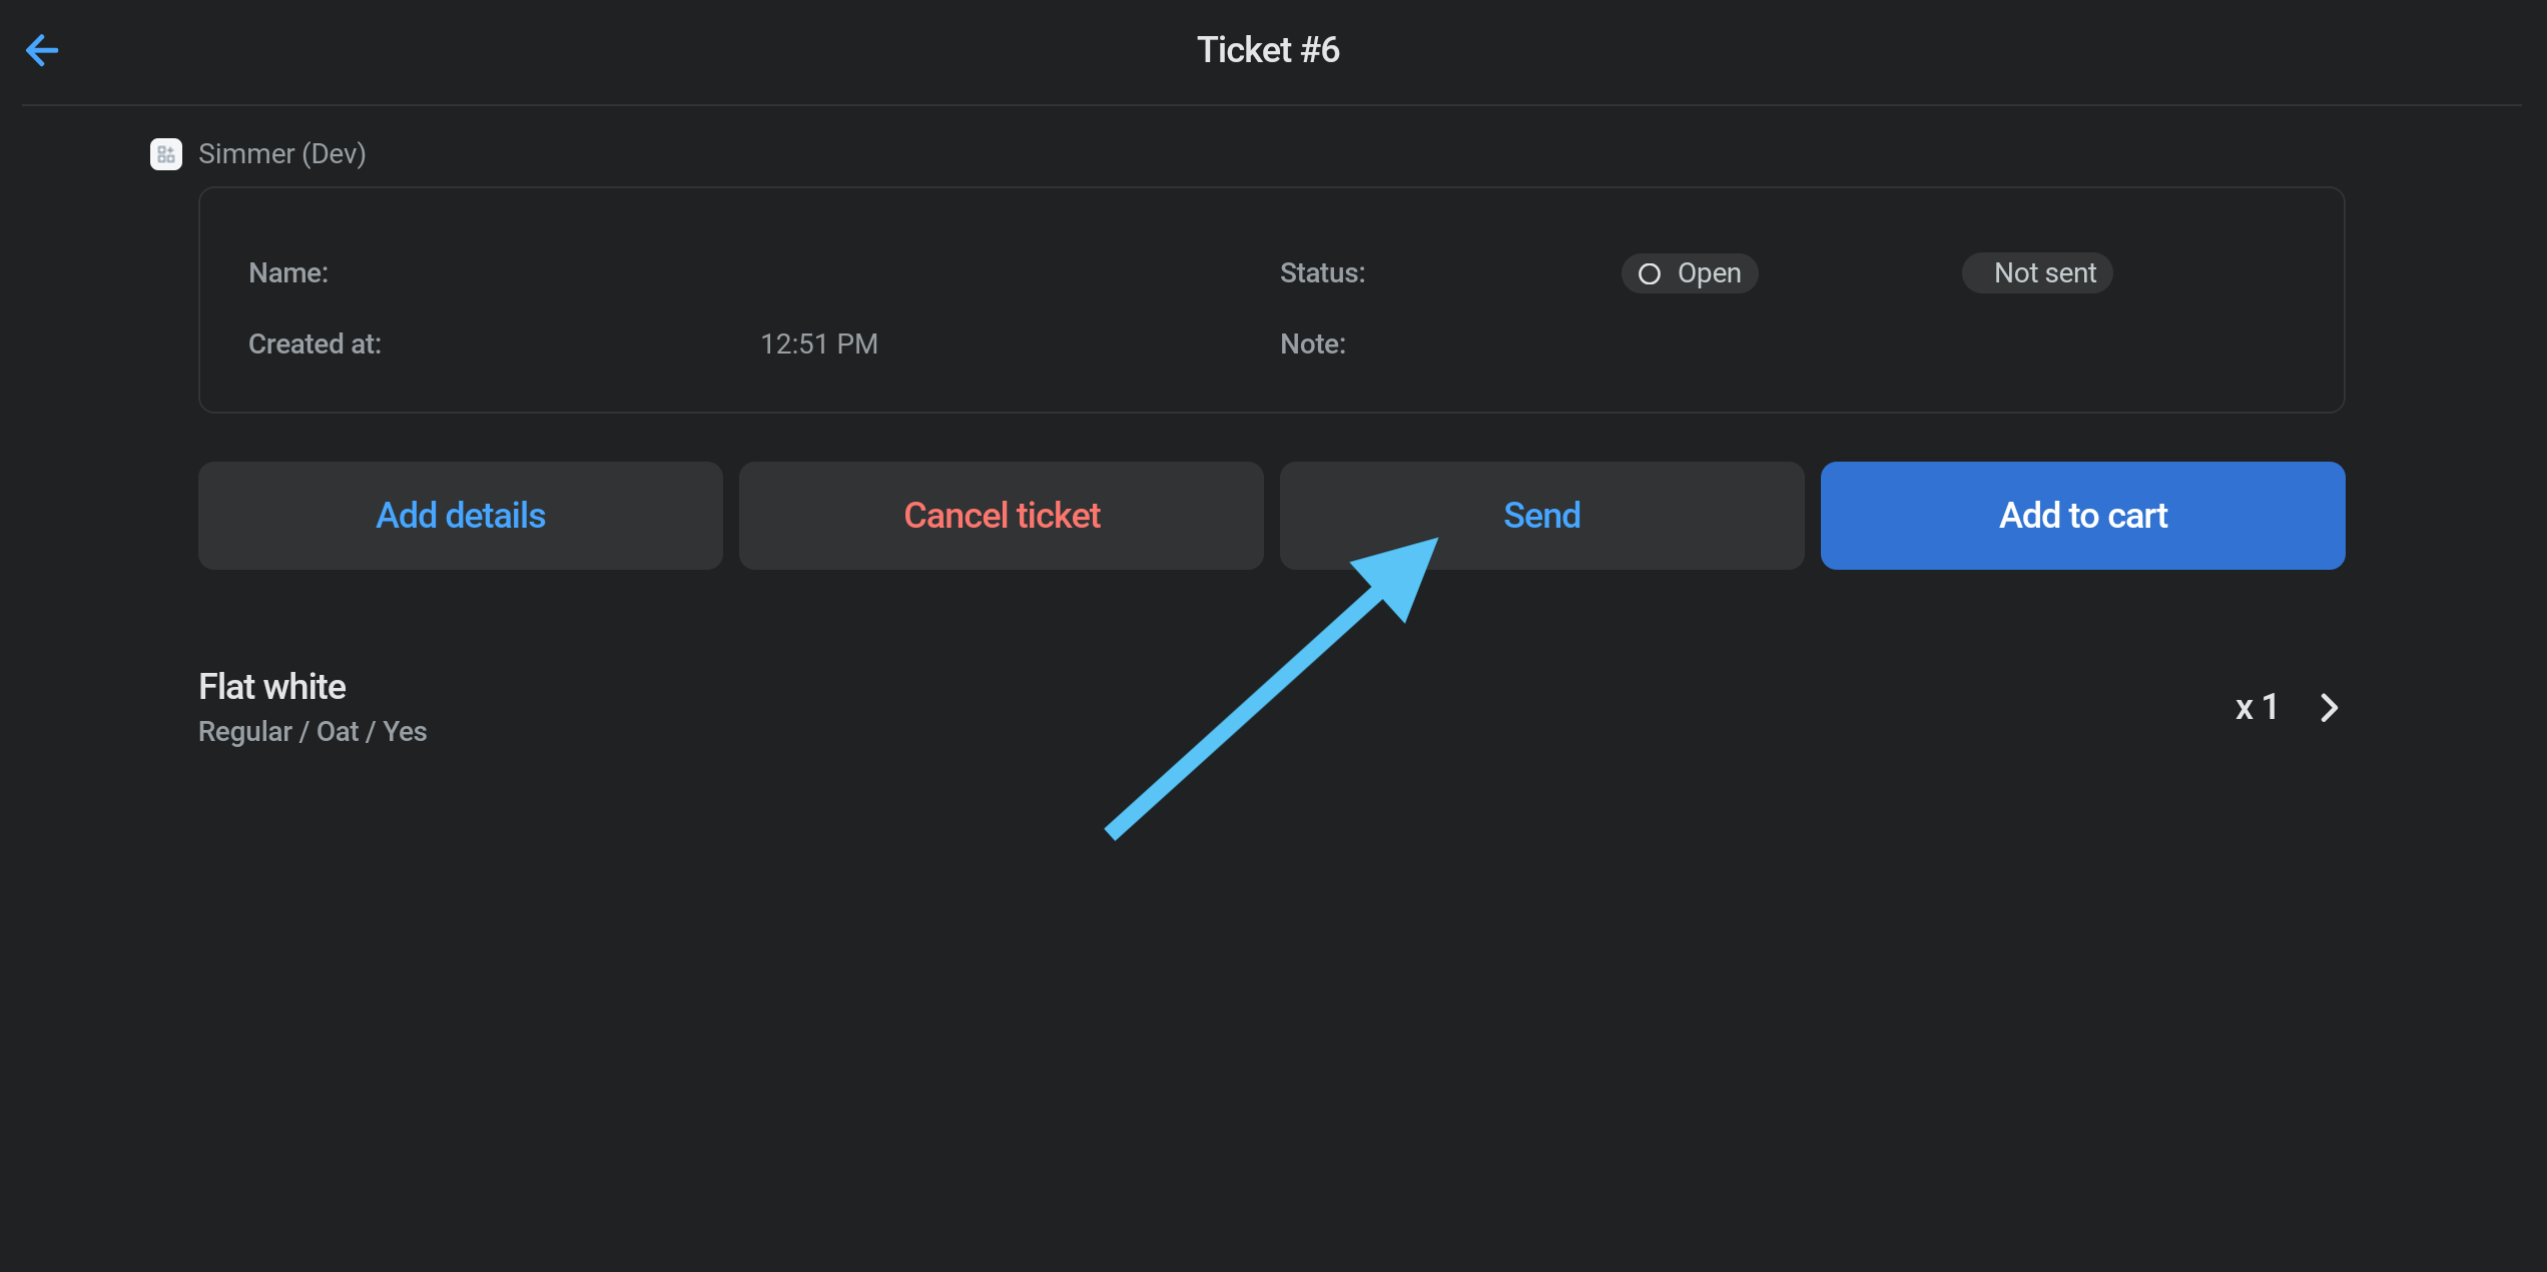
Print tickets
You can now print tickets from the Simmer POS tile by going to the ticket and clicking Send: